Mastering Homemade Powdered Sugar: Any Sugar, Any Blender, Instant Freshness
Imagine this: you're halfway through whipping up a decadent buttercream frosting, a batch of delicate macarons, or a glaze for your morning cinnamon rolls, and suddenly, you hit a snag. The dreaded moment of realizing your powdered sugar container is empty. Panic sets in, followed by the inevitable grocery store trip, or worse, abandoning your baking dreams. What if we told you those days of worry are over? Learning how to make powdered sugar at home is not just a clever hack; it's an absolute game-changer, deserving a top spot on every baker's essential skills list.
The secret? Powdered sugar is simply ultra-finely ground granulated sugar. That's right – the same humble sugar you use in your coffee can be transformed into the silky, cloud-like confectioner's sugar essential for so many recipes. This simple tutorial will unlock instant freshness and endless possibilities in your kitchen, ensuring you're never caught off guard again. Whether you have a high-speed blender, a trusty food processor, or even a humble coffee grinder, the power to create your own powdered sugar is literally at your fingertips.
Unpacking Powdered Sugar: What's in a Name?
Before we dive into the "how-to," let's clarify what exactly we're working with. Powdered sugar goes by many aliases, and understanding them can prevent confusion. You might know it as confectioners' sugar, a term often preferred in North America, or icing sugar, commonly used in the UK and Commonwealth countries. Regardless of the name, they all refer to the same finely milled product. Another term you might encounter on packaging is "10X sugar." This isn't some arbitrary marketing gimmick; the "10X" refers to the number of times the granulated sugar has been processed or milled, indicating its extreme fineness. The more "X"s, the finer the grind, leading to a smoother, less gritty texture in your baked goods and frostings.
This fine texture is crucial for achieving that characteristic melt-in-your-mouth quality in glazes, a perfectly smooth buttercream, or a delicate dusting on pastries. Regular granulated sugar, with its larger crystals, would create a grainy texture and fail to dissolve properly in many applications. By mastering how to make powdered sugar, you're essentially taking control of this fundamental ingredient, ensuring its quality and freshness for all your culinary creations.
The Essential Tools for Crafting Homemade Powdered Sugar
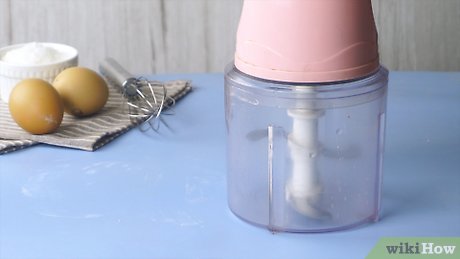
The beauty of making powdered sugar at home lies in its simplicity, requiring just one primary piece of equipment: a powerful appliance capable of pulverizing sugar crystals into a fine powder. The more robust your machine, the quicker and more efficient the process will be.
- High-Speed Blenders: Appliances like a Vitamix or Nutribullet are ideal. Their strong motors and sharp blades can tackle granulated sugar with ease, transforming it into a superfine powder in minutes. The key is their ability to create a vortex that continuously pulls the sugar into the blades.
- Food Processors: A good quality food processor can also do the job effectively. While it might take a minute or two longer than a high-speed blender, and you may need to scrape down the sides more frequently, it's a perfectly viable option for achieving a fine powder.
- Coffee Grinders or Spice Grinders: For smaller batches, a dedicated coffee grinder (ensure it's clean and free of coffee residue!) or a spice grinder works remarkably well. These are designed for fine grinding and are excellent for when you only need a cup or two of powdered sugar. Some enthusiastic home bakers have even reported success with smaller personal blenders like a Magic Bullet, often requiring smaller batches and a bit more blending time.
Pro Tip: When using smaller appliances like coffee grinders or personal blenders, it’s best to work in smaller batches. Overfilling your machine can strain the motor and prevent the sugar from being evenly processed. Start with about 1/2 to 1 cup of granulated sugar at a time. Always ensure the lid is securely fastened before blending to prevent a sugary explosion in your kitchen!
Your Step-by-Step Guide: How to Make Powdered Sugar Instantly
Ready to transform humble sugar into a baking powerhouse? Here’s a simple, foolproof method for how to make powdered sugar:
Ingredients You'll Need:
- Granulated White Sugar: This is your base. You can use regular cane sugar, organic granulated sugar, or even raw sugar for a slightly different flavor and color profile.
- Cornstarch (Optional): Also known as cornflour in some regions, this is the anti-caking agent. More on its role below! A common ratio is 1 tablespoon of cornstarch for every 1 cup of granulated sugar.
The Process:
- Measure Your Ingredients: For every 1 cup of granulated sugar, add 1 tablespoon of cornstarch if you plan to store your powdered sugar. If you’re using it immediately, you can omit the cornstarch entirely for a purer product.
- Combine in Blender: Place your granulated sugar (and cornstarch, if using) into your chosen blending appliance. Do not overfill.
- Blend Until Fine: Secure the lid tightly. Begin blending on high speed. The sugar will quickly turn cloudy and then into a fine powder. Blend for approximately 4 to 5 minutes. The exact time will depend on the power of your appliance.
- Stir and Re-Blend (If Necessary): Stop the blender periodically (every minute or so) and give the sugar a stir with a spatula. This ensures all the sugar crystals, especially those clinging to the sides or bottom, are pulled into the blades for even processing.
- Check for Fineness: The ultimate test is tactile. Carefully dip your fingers into the powder. It should feel incredibly smooth and silky, with no noticeable grittiness. If it feels coarse or sandy, continue blending and stirring until it reaches the desired consistency. You want it to mimic the texture of store-bought powdered sugar.
Once you've achieved that perfect, velvety texture, your homemade powdered sugar is ready to use!
The Cornstarch Conundrum: Why and When to Use It
You might have noticed that most commercial powdered sugars list cornstarch as an ingredient. There's a very good reason for this: cornstarch acts as a natural anti-caking agent. Sugar is hygroscopic, meaning it readily absorbs moisture from the air. This absorption can lead to unsightly and frustrating clumps and cakes, especially during storage. Cornstarch, with its fine texture and moisture-absorbing properties, helps to keep the individual sugar particles separate, ensuring your powdered sugar remains loose and free-flowing over time.
So, should you use cornstarch when you make your own? It depends on your immediate plans:
- For Storage: If you intend to store your homemade powdered sugar for future use, adding cornstarch is highly recommended. It will significantly extend its shelf life and prevent clumping. A ratio of 1 tablespoon of cornstarch per cup of granulated sugar is generally sufficient.
- For Immediate Use: If you're whipping up a batch of frosting or a glaze right after blending, and plan to use all the powdered sugar at once, you can absolutely skip the cornstarch. This allows for a "cleaner" ingredient list, which some bakers prefer.
What if you don't have cornstarch? If you need to store your powdered sugar but are out of cornstarch, other finely ground starches like arrowroot powder or tapioca starch can serve a similar purpose. For an in-depth exploration of this essential ingredient, check out The Secret to Perfect Powdered Sugar: Cornstarch & Blending.
Beyond White Sugar: Exploring Your Options & Storage
One of the fantastic advantages of learning how to make powdered sugar is the freedom to experiment with different types of sugar. While traditional recipes call for granulated white sugar, your homemade approach opens doors to healthier or more unique flavor profiles:
- Raw Sugar/Turbinado Sugar: These sugars will produce a light brown powdered sugar with a subtle caramel note, perfect for specific baked goods where you want that hint of molasses flavor.
- Coconut Sugar: For those seeking lower glycemic index options or unique flavors, coconut sugar can also be processed into powdered form. Be aware that the resulting powder will be light brown and carry the distinct flavor of coconut sugar.
The process remains the same regardless of the sugar type – simply blend until ultra-fine. This flexibility adds incredible value to your baking repertoire, allowing you to tailor your ingredients to your dietary preferences or recipe requirements.
Storage and Shelf Life
Properly stored, homemade powdered sugar (especially with cornstarch added) boasts an incredibly long shelf life – practically indefinite! The key is to protect it from moisture and contaminants. Store your powdered sugar in an airtight container in a cool, dark, and dry place, such as a pantry. If you opted to make it without cornstarch, it's best to use it immediately, as it will be more prone to clumping.
While powdered sugar doesn't "go bad" in the traditional sense, there are signs that indicate it should be discarded:
- Mold: Any visible mold is a clear sign to discard the entire batch.
- Pantry Pests: If you discover any insects or larvae, dispose of the sugar immediately.
- Foul Odor: Sugar should smell sweet and neutral. If it develops any off or chemical odors, it's best to err on the side of caution and toss it.
Small clumps, however, are often normal, especially if the container has been opened frequently or in humid conditions. These can usually be broken up with a spoon or by sifting the sugar before use. For more quick and easy DIY tips, explore Homemade Powdered Sugar: Your Quick & Easy DIY Guide.
Conclusion
There you have it! The seemingly magical ingredient that is powdered sugar is, in fact, incredibly simple to create right in your own kitchen. By understanding how to make powdered sugar, you not only save yourself time and money but also gain complete control over the freshness and purity of your ingredients. From last-minute frosting emergencies to experimenting with alternative sugars, this straightforward technique empowers you to be a more confident and resourceful baker. So, next time your recipe calls for this essential ingredient, skip the store and head straight to your blender – instant freshness awaits!
